Epic Authentication
This module lets you quickly add "login via Epic Games" functionality to your game. It relies on the Epic Online Services (EOS) Software Development Kit (SDK) - a C# library that communicates with EOS. The EOS SDK is responsible for the authentication of the player inside your game client. Once authenticated there, this module will use the EOS SDK to authenticate the same player in Unisave by finding or creating a corresponding player document in the ArangoDB database and calling Auth.Login(doc) with that document (learn more about the Auth facade here).
Version:
1.0.0
Unisave:0.12.1or higher
Asset Store: Epic Authentication - Unisave
Download: unisave-epic-authentication-1.0.0.unitypackage
GitHub: unisave-cloud/epic-authentication
Module overview
Before you begin, you should understand how Unisave authentication via the Auth facade works. To do a brief recap:
- We store all known players in the ArangoDB database as documents of a collection. One document represents one player and the ID of that document is the ID of that player as far as Unisave is concerned. We may use raw AQL queries, or we can use entities to work with the database.
- The
Authfacade is a Unisave backend-only utility, that lets us remember, which player is logged in (for each client session separately). We give it a database document ID and it will remember that ID (typically the document ID representing the player). We can ask it for the ID if we need to check if or who is logged in. - To build a custom authentication system (say email and password), we need to store the email and password in the player document. During login we find the document based on the entered credentials and pass the document to the
Authfacade to perform the login.
With Epic Games, we have players that have an Epic Account. This account has an ID, called Epic Account ID. What this module does is that it stores the Epic Account ID in the player document (like the email address) and performs some talking to the Epic servers to verify the player (like the password). Then it stores the corresponding player document in the Auth facade.
This process happens in two phases:
- Your game client logs into EOS via the EOS SDK (no Unisave interaction).
- You call
this.LoginUnisaveViaEpic(...);in aMonoBehaviourwhich logs the same player in on the backend server.
Installation
First, you should have Unisave installed in your Unity project with backend uploading set up and working. If not, see the installation instructions.
Then, start by importing this Unisave module as a Unity package into your project:
- via the Unity Asset Store
- or from the
.unitypackagedownloaded from the GitHub releases page
Now, create an Epic Games Account, create a Product (your game) and download the C# EOS SDK. You can do so by following this EOS documentation page.
Note: You don't need to register if you just want to try the demo scene. But you do need it to start integrating your game.
Note: You can download the C# SDK without registration from the SDK webpage.
Extract the downloaded zip file and copy these files and folders to these places in your Unity project:
ZIP:/SDK/Bin/EOSSDK-Win64-Shipping.dllcopy toUNITY:/Assets/Plugins/EOSSDK/EOSSDK-Win64-Shipping.dll(assuming you target Win64, otherwise you need to use binaries for other platforms)ZIP:/SDK/Source/Corecopy toUNITY:/Assets/Plugins/EOSSDK/CoreZIP:/SDK/Source/Generatedcopy toUNITY:/Assets/Plugins/EOSSDK/Generated

Note: You can also read the official documentation for the SDK integration with Unity to get a better idea of how it works.
Notice that we place the SDK into the Assets/Plugins folder, not directly to Assets. This is because this Unisave module is also in the Plugins folder and this folder compiles before everything else. Not having the SDK here would mean this module would not see the SDK C# classes. If you need to have the SDK outside the Plugins folder, you have to move the Assets/Plugins/UnisaveEpicAuthentication folder outside as well.
Demo project walkthrough
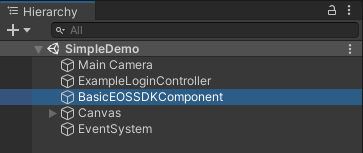
This module comes with an example scene in the folder: Assets/Plugins/UnisaveEpicAuthentication/Examples/SimpleDemo

Note: The scene uses TextMesh Pro to render UI text, so you should have it installed. In Unity, click on
Window > TextMeshPro > Import TMP Essential Resources.
When you open the scene and hit play, you'll see the following screen:
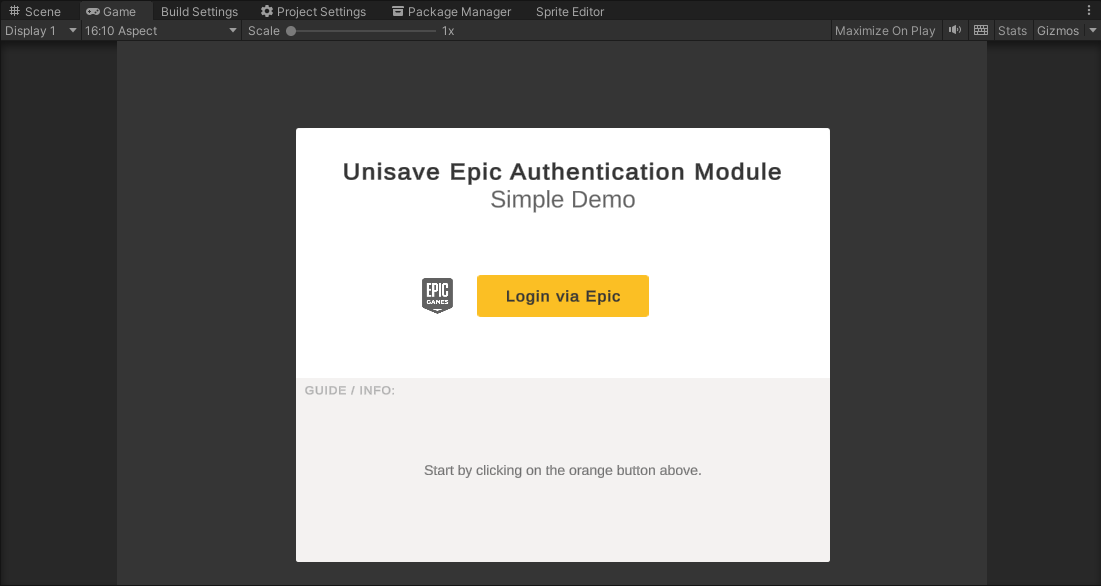
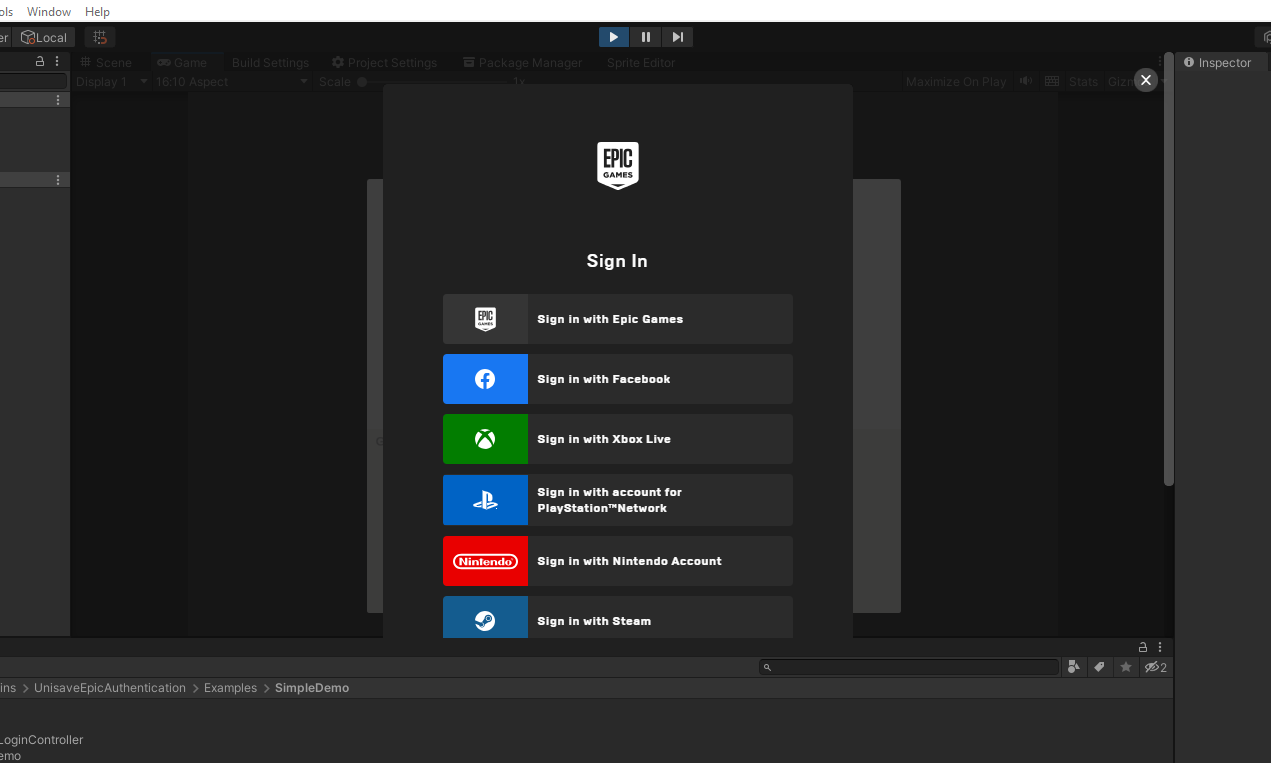
When you click the orange button, an Epic Account Portal overlay is displayed over your game that asks you to log in. It may also open a browser window with the login portal instead (especially in the Unity Editor the behaviour is iffy - in your final built game the overlay should work fine).
When you follow through, the overlay will close and the authentication will continue. In the end it will display a Success! message:
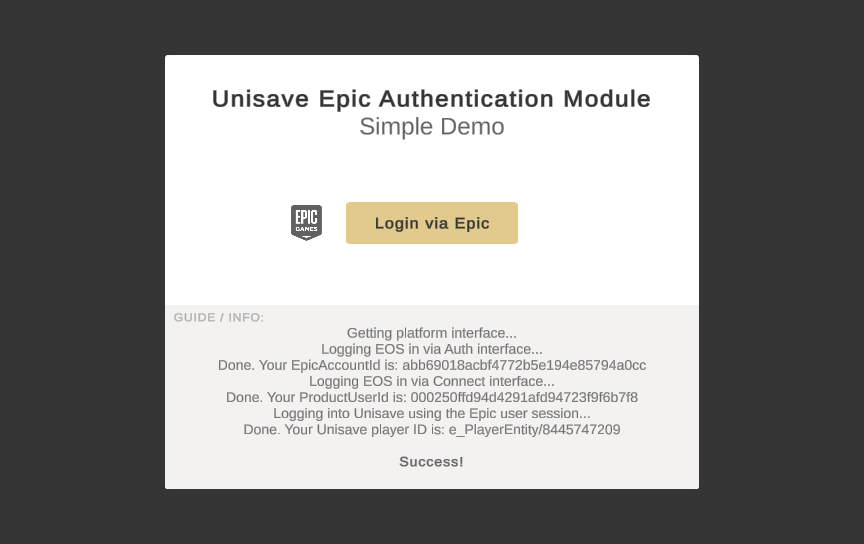
At this point you are logged into Epic in you game (see the EpicAccountId abb69018ac...) and you are also logged into Unisave via that Epic account as a Unisave player e_PlayerEntity/8445747209.
Now, if you make a facet call to your backend server, whenever you call Auth.GetPlayer<T>(), it will return the document e_PlayerEntity/8445747209.
If we open the database and find the player document, we see that it's connected with the Epic Account (see the epicAccountId field):
{
    "_id": "e_PlayerEntity/8445747209",
    "_rev": "_giUsKhS---",
    "_key": "8445747209",
    "epicAccountId": "abb69018acbf4772b5e194e85794a0cc",
    "epicProductUserId": "000250ffd94d4291afd94723f9f6b7f8",
    "lastLoginAt": "2023-08-30T09:02:38.557Z",
    "CreatedAt": "2023-08-18T13:11:04.382Z",
    "UpdatedAt": "2023-08-30T09:02:38.576Z"
}
Connecting with your Epic product
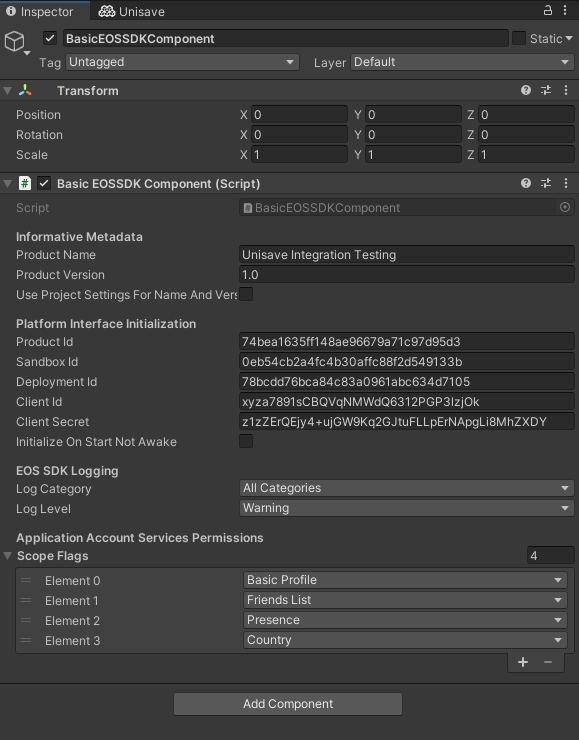
The example project is by default configured to connect to an Epic Product (a game) I created, called Unisave Integration Testing. Its credentials are filled out in the BasicEOSSDKComponent, which is a component responsible for the EOS communication.
You can begin your integration by first creating your own Epic Product and connecting it with this demo scene. When you get that working, you can start modifying the source code.
Let's first connect the demo to your own Epic Product:
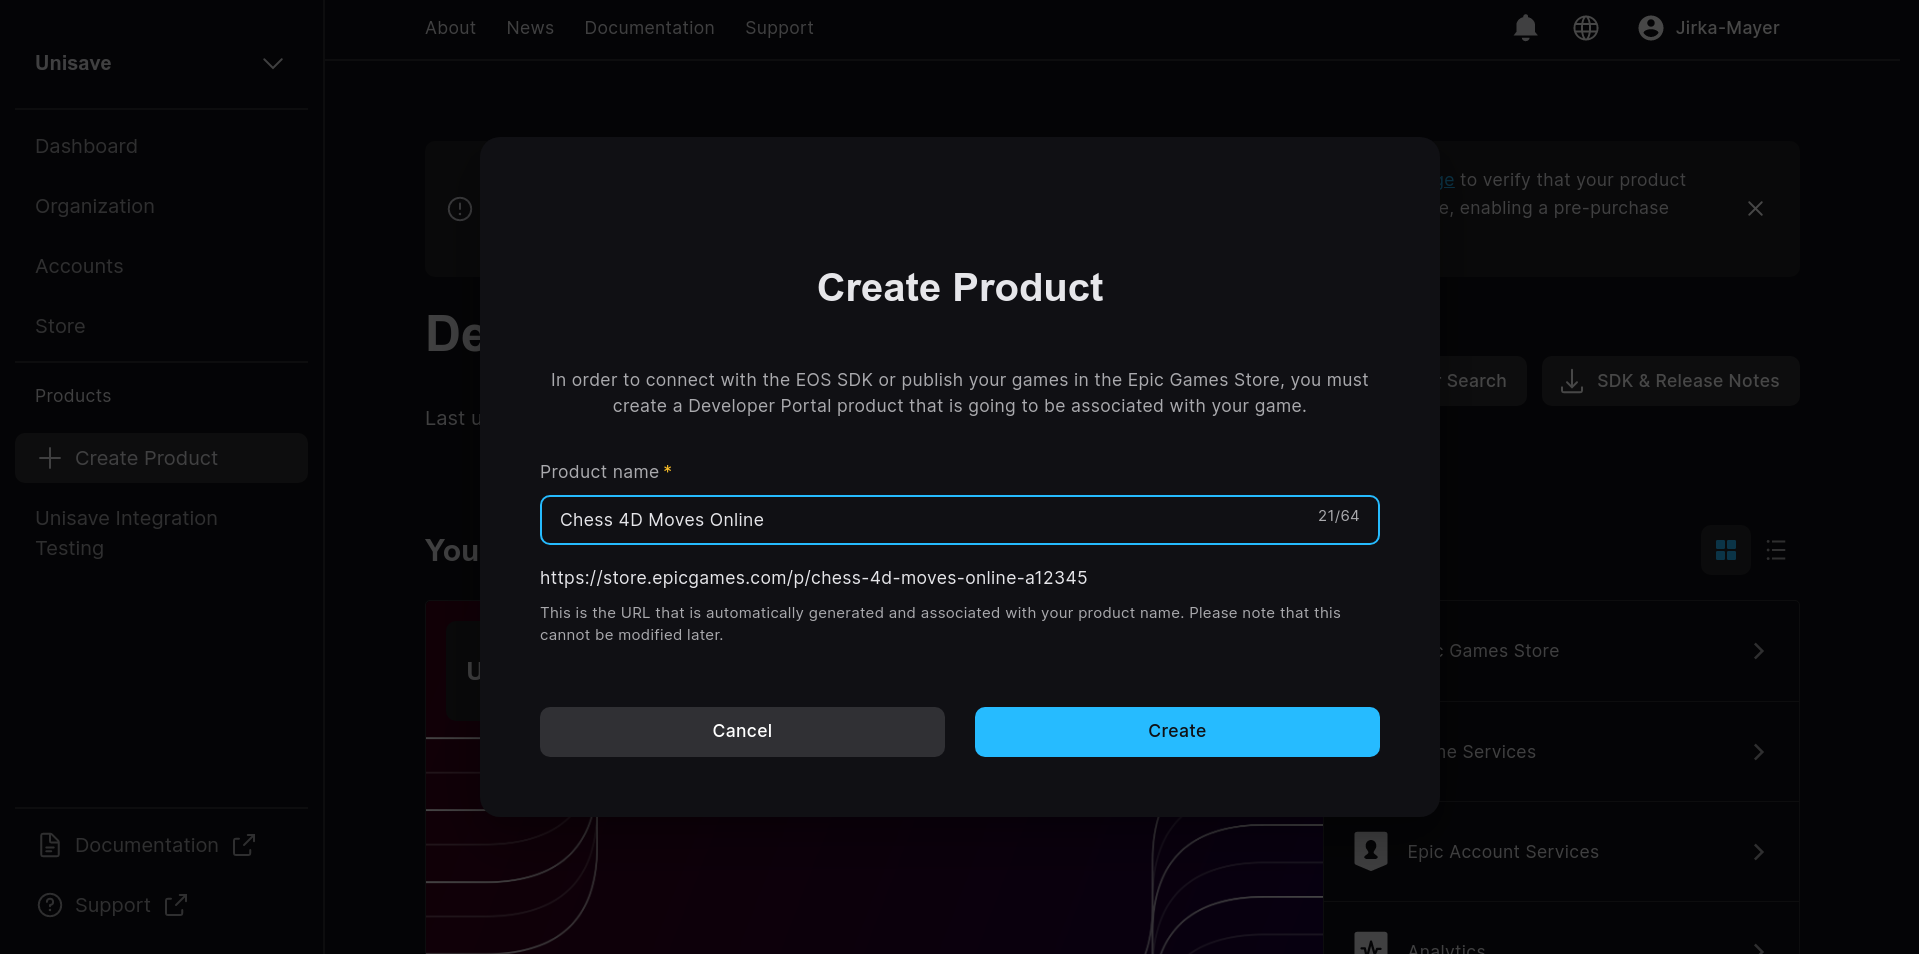
- Create an Epic Developer Account and an Organization for yourself at dev.epicgames.com/portal.
- In the Developer Portal create a new Product (a new game)
- In the Product Settings, when you scroll down, you can see the
ProductID,SandboxID, andDeploymentID. Copy these into theBasicEOSSDKComponent.
- In the Clients tab, you need to create a new Client Policy and a new Client. When creating the policy (you can call it
Unity Client Policy), you set the Permission Configuration toGame Client. This pre-fills the permissions in a way suitable to a game client (a built game distributed to players, as opposed to a server build). You can, of course, customize the permission set, depending on your needs and usage of Epic Online Services. Then you create a new client (you can call itUnity Client) with the created client policy. You can leave the other two fields empty (trusted server and epic account service). You should end up with this: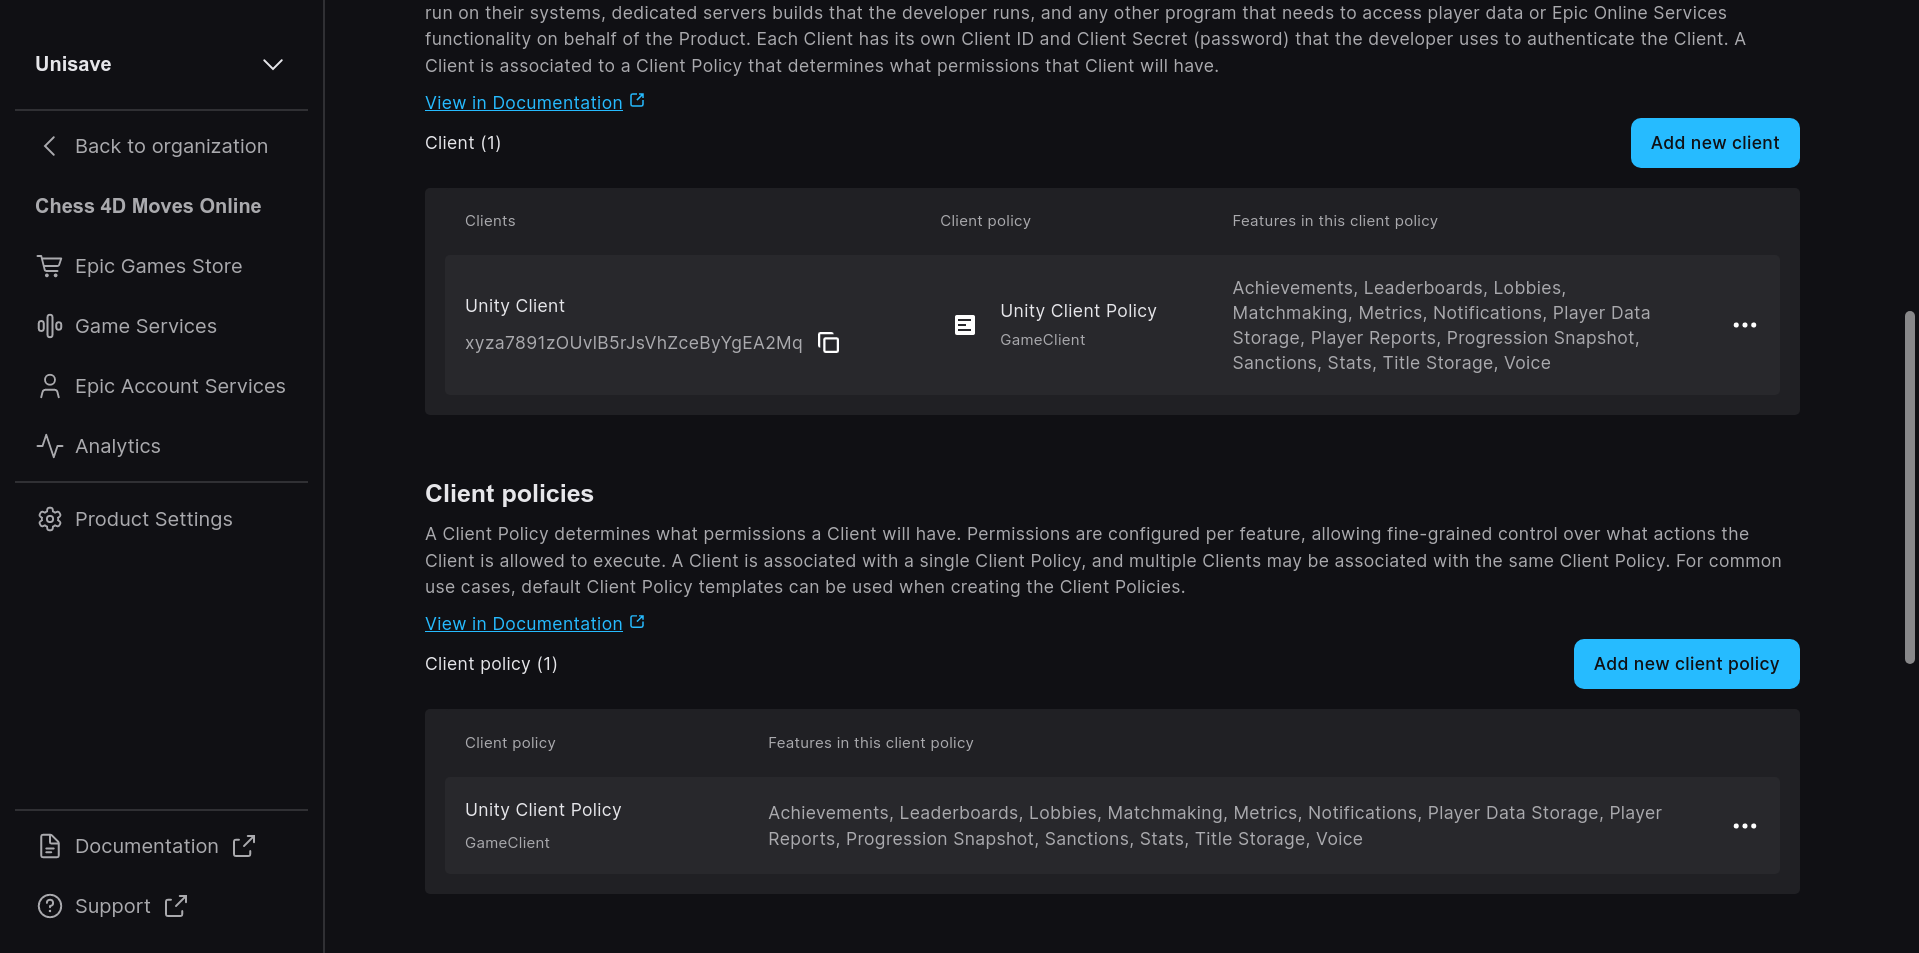
- If you go back to the first Product Settings tab, you should see the new client. Copy the
ClientIDand theClientSecretinto theBasicEOSSDKComponent.
Note: The secret is not really a secret for game clients (builds that you distribute), but it is indeed a secret for server builds. This is because server builds typically have more privileges than game clients (they can access data about any player). - The last step is to configure an Application. It is something that represents your game within Epic Account Services (a subset of EOS that we use for authentication). An Application with the same name as your Product is already created, you just need to configure it. This is done in the Epic Account Services page of your Product:
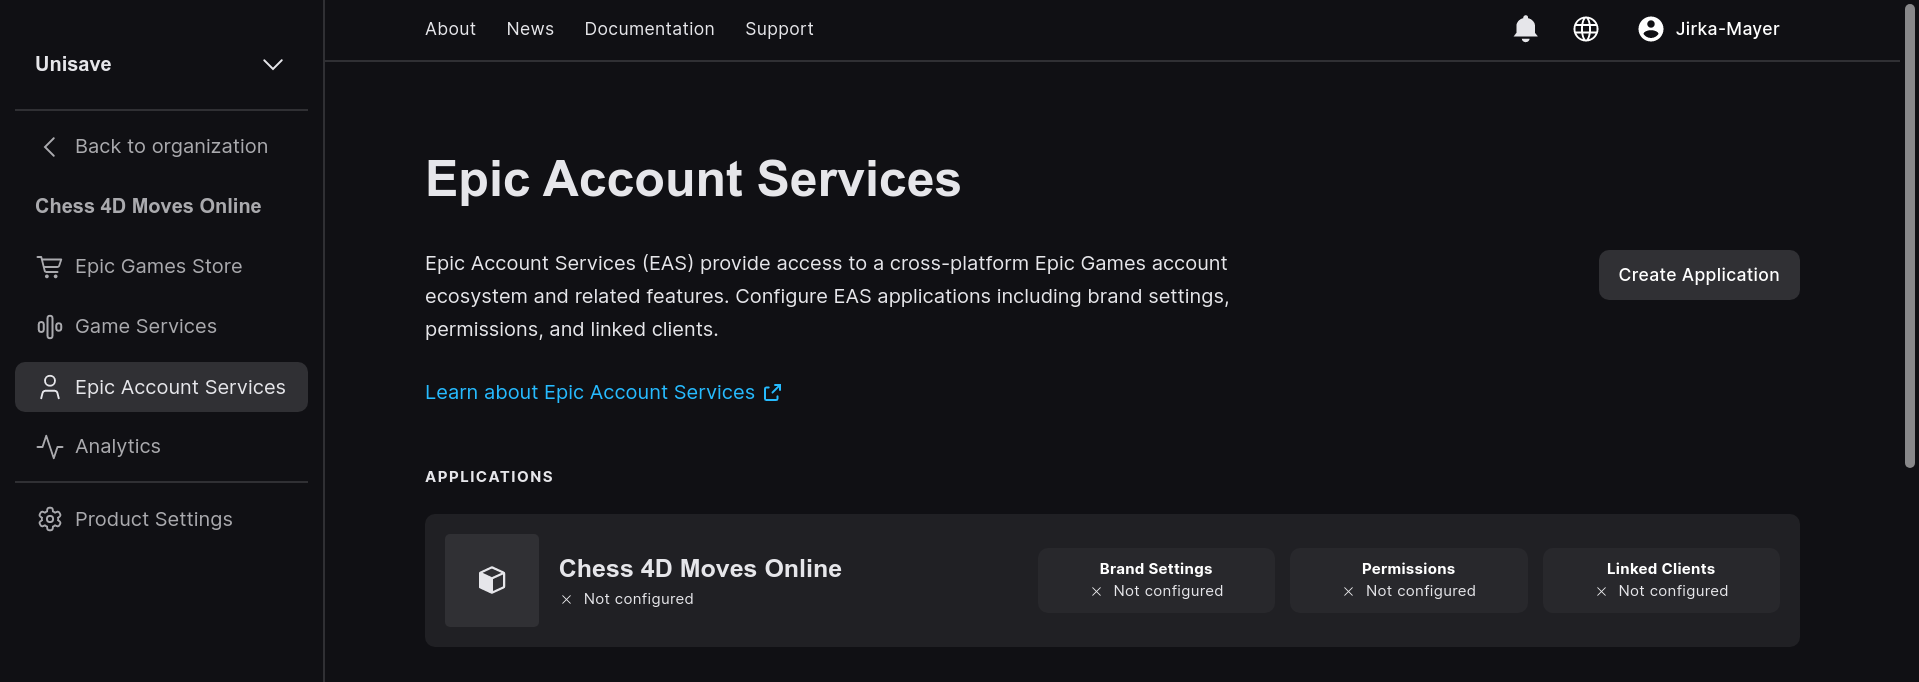
- You fill out the brand settings, permissions, and link the Client we have created earlier.
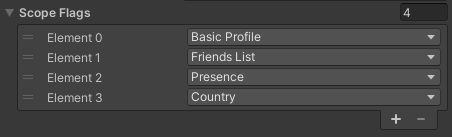
- Transfer the selected permissions into the
BasicEOSSDKComponentas theScopeFlags. Make sure you select the exact same flags as the permissions you have granted. No more, no less. If you don't set this right, the game will just not work with cryptic messages and freeze on play-mode exit. Yay!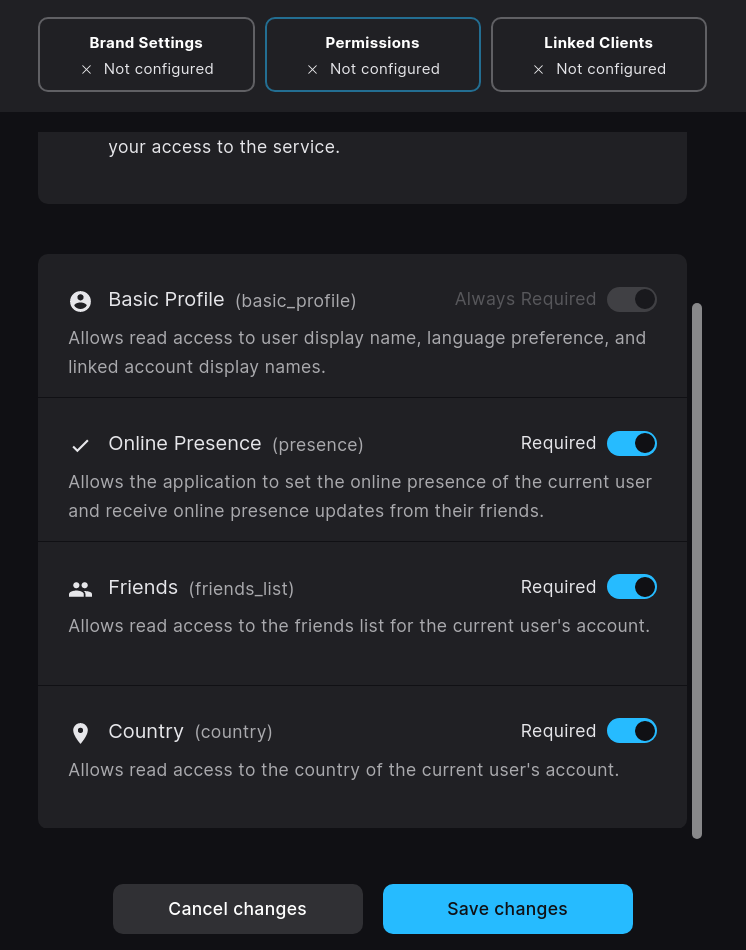
- Lastly fill out your game name and version into the
BasicEOSSDKComponent. These values are only informative and don't need to match anything in the Developer Portal. You can tick the checkbox to get the values from Unity Project Settings instead. - You can also adjust the logging level, or disable it completely. The SDK logs a lot of errors even if everything works (because it has to do workarounds when running in the Unity Editor).
With everything filled out, you can enter the play mode again. The demo should behave the same, except that now the EOS SDK is logging into your game, not the Unisave Integration Testing demo game.
Epic Auth Tool
So far, when you launched the demo, an Epic Account Portal overlay was displayed for the player to log in. In practise, the game is going to be launched via the Epic Launcher, so the authentication will require no player interaction (the BasicEOSSDKComponent already supports this, but falls back on the overlay in the Unity Editor).
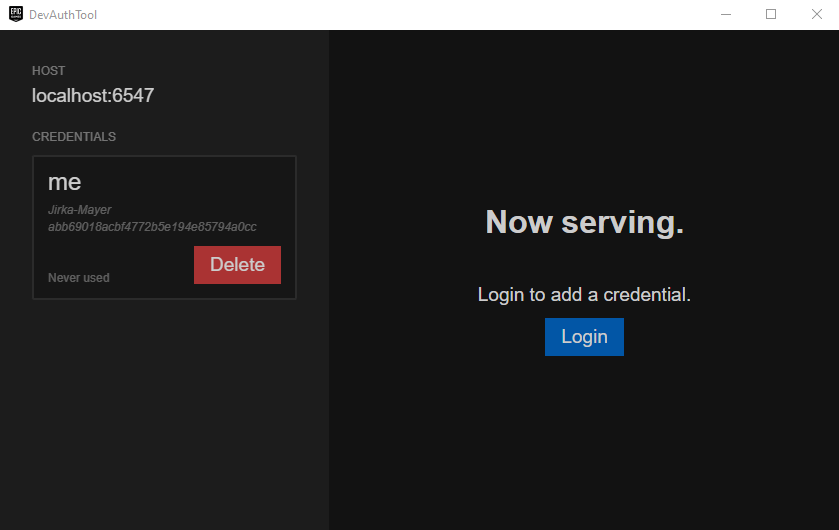
During development, there is a better way to perfom login. You can use the Developer Authentication Tool that comes with the SDK zip file in the SDK/Tools folder.
When you launch this tool, it asks you for a port. Enter the port:
6547
Then you can click "Log in" to create a new credential. Log into your Epic Account and name the new credential me. The credential will be used by the BasicEOSSDKComponent to log you in automatically, instead of displaying the overlay. The credential has to be called me, this is what the BasicEOSSDKComponent expects.
Using this tool speeds up testing and clears up error logs from the console (since using the other methods inside Unity Editor logs tons of errors as various attempts fail).
Understanding the code
Now that we know how to configure the demo project, let's look at how it works so that you can transfer it to your game.
So far, we worked with the BasicEOSSDKComponent. This component is responsible for loading and managing the EOS SDK library. You can add this component to your startup scene. It will call DontDestroyOnLoad on itself, so that it will always be available in your game.
The component initializes a Platform Interface, which is a C# object that we can use to communicate with the Epic Online Services (EOS). You can access this object via a public static property:
using Unisave.EpicAuthentication;
using Epic.OnlineServices.Platform;

// get the BasicEOSSDKComponent instance
BasicEOSSDKComponent sdkComponent = BasicEOSSDKComponent.Instance;

// get the platform interface
PlatformInterface platform = sdkComponent.PlatformInterface;
The BasicEOSSDKComponent is initialized during Awake, so you can use the PlatformInterface immediately in the Start method of any component.
The BasicEOSSDKComponent is used inside the ExampleLoginController, which is a top-level controller responsible for the button and the user interface. Let's look at its implementation now:

Note: You can open its source code online on GitHub.
When you click the orange button, the OnLoginClick method is called. There, the code first calls sdkComponent.AuthLogin():
Epic.OnlineServices.Auth.LoginCallbackInfo info
    = await sdkComponent.AuthLogin();

if (info.ResultCode == Result.Success)
    Debug.Log("Your EpicAccoundId: " + sdkComponent.EpicAccountId);
else
    Debug.Log("Login failed: " + info.ResultCode);
This method tries log your game client into EOS via the Auth interface using:
- the Developer Authentication Tool
- the Epic Launcher exchange code passed in via command-line arguments
- the Epic Account Portal login overlay
If all fail, the method returns the last failure. Otherwise it returns the first success.
This does no talking to Unisave. This only logs in the game client and gets the Epic Account ID of the player. After this, you can access Epic Friends and other EOS serivces, but as far as Unsiave is concerned, you are still logged-out.
Then the sdkComponent.ConnectLoginOrRegister method is called.
Epic.OnlineServices.Result result = await sdkComponent.ConnectLoginOrRegister();

if (result == Result.Success)
    Debug.Log("Your ProductUserId: " + sdkComponent.ProductUserId);
else
    Debug.Log("Login failed: " + result);
This methods performs a similar login to EOS Game Services (a subset of EOS), which uses the Connect interface to log in. More specifically, this method registers a Product User for the Epic Account if there is none, or logs in, if the player already has one.
The reason Epic has these two login interfaces is that you may create Product User accounts for players who don't have an Epic Account (say, when you distribute to Xbox and don't want players to register at Epic Games). If you don't know what I mean, read the article Connect vs Auth in Epic Online Services.
If you already use Product User Accounts without Epic Accounts, then you need to modify this step and ask the player if they want to link an existing Product User Accounts with their Epic Account. But in such a case you already know how to do the low-level EOS SDK communication yourself. For the 95% rest of you, you can keep the code as is and just read the article - especially the Distributing only to Epic Store section.
After this step, your game is logged into EOS twice, via both the Auth and the Connect interface. Therefore it can access both the Epic Account Services as well as the EOS Game Services. But from the Unisave perspective, you are still not logged in.
Now comes the time to log into Unisave via the two already performed Epic logins:
using Unisave.EpicAuthentication;

EpicLoginResponse response = await this.LoginUnisaveViaEpic(
    sdkComponent.PlatformInterface
);

Debug.Log("Your Unisave player ID: " + response.PlayerId);
The this.LoginUnisaveViaEpic is an extension method on MonoBehaviour that you can use from any MonoBehaviour as long as you have the using Unisave.EpicAuthentication; statement in place.
This method uses the platform interface to get the current Epic Account ID and Product User ID and sends them to the backend server. They are used to find the proper player (or register a new one) and log them in. In the response you get the document ID of the logged-in player.
Note: Note that the method is not just sending the IDs as plain text. It sends Json Web Tokens received from EOS, that can be verified server-side to make sure the client is not making things up and attempting to login as someone else.
Because there are many ways to use the database (entities, raw AQL, etc.), you need to specify, how the search and registration take place. For this there is a backend bootstrapper file that implements these methods. The file is at:Assets/Plugins/UnisaveEpicAuthentication/Examples/SimpleDemo/Backend/EpicAuthBootstrapper.cs
A minimal bootstrapper implements these two methods:
using System;
using Unisave.EpicAuthentication;
using Unisave.Facades;

public class EpicAuthBootstrapper : EpicAuthBootstrapperBase
{
    public override string FindPlayer(
        string epicAccountId,
        string epicProductUserId
    )
    {
        // Find the player document by epicAccountId first,
        // then try epicProductUserId. Return the player's
        // document ID, e.g. "players/123456".
        // If there's no such player, return null
        // and a new player will be registered.
    }

    public override string RegisterNewPlayer(
        string epicAccountId,
        string epicProductUserId
    )
    {
        // Create a new player document and save it
        // to the database. Return its document ID.
        // Don't forget to store the Epic identifiers
        // inside the created document.
    }
}
You can read the section Epic Auth Bootstrapper to learn more about this.
Basic EOS SDK Component
The BasicEOSSDKComponent is a MonoBehaviour script responsible for loading and managing the EOS SDK and for initializing a PlatformInterface instance used for the interaction with EOS. The script is located in Assets/Plugins/UnisaveEpicAuthentication/Scripts/BasicEOSSDKComponent.cs
It is meant as a reasonable default for most games that want to integrate with Epic Online Services, so you can just drop it into your game and use it as is. If you, however, need some additional features, you can always copy its code into a new component and modify it as you see fit.
Note: Do not modify the code of the component directly, do make a copy first (you can call it
MyEOSSDKComponent) and move it outside theUnisaveEpicAuthenticationfolder. If you modify the component directly, it will be hard for you to update this module, when new version comes out.
The component calls DontDestroyOnLoad on itself, so you only need to include it in your startup scene.
The configuration of this component is explained in detail in the section Connecting with your Epic Product.
If you need to set the configuration fields programatically, you can delay the platform initialization to the Start method by ticking the corresponding checkbox and setting the other public fields during Awake (by having a reference to the component created in the Unity Editor).
To get hold of the instance from anywhere in your game after it has been initialized, you can use the Instance static property:
BasicEOSSDKComponent sdkComponent = BasicEOSSDKComponent.Instance;
You can then use it to access the lower-level EOS SDK PlatformInterface:
PlatformInterface platform = sdkComponent.PlatformInterface;
It will return null if the interface has not been initialized yet, or has failed initializing.
Auth interface
The component exposes a couple of login methods, that log the game client into EOS via the Auth interface. The most capable one is AuthLogin() which tries all the other methods one by one (auth tool, epic launcher, account portal).
Epic.OnlineServices.Auth.LoginCallbackInfo info
    = await sdkComponent.AuthLogin();

if (info.ResultCode == Result.Success)
    Debug.Log("Your EpicAccoundId: " + sdkComponent.EpicAccountId);
else
    Debug.Log("Login failed: " + info.ResultCode);
Note that the player can cancel the login procedure, in which case the Result.Canceled is returned. The method does not throw any exceptions.
If the login succeeds, the logged-in Epic Account ID becomes available via:
// null if nobody logged in
string? epicAccountId = sdkComponent.EpicAccountId;
The other login methods are used in the same way:
LoginCallbackInfo info = await sdkComponent.AuthLoginViaDeveloperAuthTool();

LoginCallbackInfo info = await sdkComponent.AuthLoginViaEpicLauncher();

LoginCallbackInfo info = await sdkComponent.AuthLoginViaAccountPortal();
The Account Portal login almost never fails and can be used as a fallback when all the other options aren't available. It shouldn't be used as a default though, as it may ask the player for a 2FA verification code each time they log in.
The Epic Launcher method will return Result.AuthExchangeCodeNotFound if the game was not launched via the Epic Launcher. It works by reading an Exchange Code from the command-line arguments passed in by the Epic Launcher. This method should be used shortly after the game is launched, becase the Exchange Code expires and after that this method also returns Result.AuthExchangeCodeNotFound.
You can use these methods if you want to implement the login yourself:
bool isEpicLaunched = sdkComponent.IsLaunchedViaEpicLauncher();

string? exchangeCode = sdkComponent.GetExchangeCode();
The Developer Auth Tool method can be customized with these arguments:
LoginCallbackInfo info = await sdkComponent.AuthLoginViaDeveloperAuthTool(
    host: "localhost:6547",
    credentialName: "me"
);
Connect interface
There are additional methods that let you perform login via the Connect interface. The most likely one you are going to use is ConnectLoginOrRegister(). It uses the previously established Auth interface login to log into the corresponding Product User. If there is no such user for the given Epic Account, a new Product User is created.
Epic.OnlineServices.Result result
    = await sdkComponent.ConnectLoginOrRegister();

if (result == Result.Success)
    Debug.Log("Your ProductUserId: " + sdkComponent.ProductUserId);
else
    Debug.Log("Login failed: " + result);
The method throws an exception only if there is no Epic Account currently logged in.
If the login succeeds, the logged-in Product User ID becomes available via:
// null if nobody logged in
string? puid = sdkComponent.ProductUserId;
If you already use EOS and have Product Users that don't have corresponding Epic Accounts, you need to worry about account linking. There are no methods for this, you have to implement it yourself using the EOS SDK. But you can save some work by utilizing these two helper methods:
// only attempts to login via current Epic Account
// and does nothing if the Product User does not exist
Epic.OnlineServices.Connect.LoginCallbackInfo loginInfo
    = await ConnectLoginViaAuth();

// creates a new Product User for the current Epic Account,
// accepts the continuance token from the failed login
Epic.OnlineServices.Connect.CreateUserCallbackInfo createInfo
    = await ConnectCreateProductUser(loginInfo.ContinuanceToken);
According to the EOS SDK documentation, you need to manually refresh the Connect interface session to keep yourself logged in. There are SDK methods to register for notification callbacks. However, the BasicEOSSDKComponent already handles this logic for you, so the moment a Product User becomes logged in, it starts being automatically refreshed.
MonoBehaviour extensions
This module provides a set of MonoBehaviour extension methods, that become available when you add this using statement:
using Unisave.EpicAuthentication;
Login Unisave via Epic
The most important one of these is the LoginUnisaveViaEpic method:
using UnityEngine;
using Unisave.EpicAuthentication;

public class MyController : MonoBehaviour
{
    async void Start()
    {
        // get the platform interface
        var sdkComponent = BasicEOSSDKComponent.Instance;
        var platform = sdkComponent.PlatformInterface;

        // call the extension method
        EpicLoginResponse response = await this.LoginUnisaveViaEpic(
            platform
        );

        Debug.Log(response.PlayerId);
    }
}
The method uses the EOS SDK to get the currently logged-in Epic Account and/or the logged-in Product User and uses them to log the player in inside Unisave. If the IDs are seen for the first time, a new player is registered in the database, otherwise an existing player is found and logged in. The precise way in which the player is looked up or created is defined in the Epic Auth Bootstrapper.
The player has to be logged in either via the Auth interface, or via the Connect interface, or both. It's up to the bootstrapper to decide which ID is going to be prioritized. But typically, you will be logged in via both interfaces and the Epic Account ID will be used primarily (with the PUID as a fallback).
The EOS SDK allows multiple accounts and users to be logged-in simultaneously. If that's your case, you must specify the Epic Account ID and/or the PUID to be used for the login:
EpicAccountId epicAccountId = ...;
ProductUserId productUserId = ...;

EpicLoginResponse response = await this.LoginUnisaveViaEpic(
    platform: platform,
    epicAccountId: epicAccountId,
    productUserId: productUserId
);
Epic Auth Bootstrapper
An EpicAuthBootstrapper is a class that you must define in your backend folder, which specifies, how this module behaves. It is a configuration file of sorts.
You can start by creating a new class and making it inherit from EpicAuthBootstrapperBase:
using Unisave.EpicAuthentication;

public class EpicAuthBootstrapper : EpicAuthBootstrapperBase
{
    // must be in a backend folder
}
Note: The class does not need to be called
EpicAuthBootstrapper, it just has to inherit from the base class. But since there is only going to be this one class, you can stick with the convention.
The base class requires you to implement two abstract methods:
FindPlayerRegisterNewPlayer
Find player
The FindPlayer method should find a player document in the database, given the Epic Account ID and/or the Product User ID and return the database document ID (which is the Player ID). If there is no player found, the method should return null. A reasonable implementation via entities might look like this:
public override string FindPlayer(
    string epicAccountId,
    string epicProductUserId
)
{
    // Find by Epic Account ID, if it was provided
    if (epicAccountId != null)
    {
        PlayerEntity player = DB.TakeAll<PlayerEntity>()
            .Filter(e => e.epicAccountId == epicAccountId)
            .First();

        // player is null if there was no such document
        return player?.EntityId;
    }

    // Else find by Product Account ID, if it was provided
    if (epicProductUserId != null)
    {
        PlayerEntity player = DB.TakeAll<PlayerEntity>()
            .Filter(e => e.epicProductUserId == epicProductUserId)
            .First();

        // player is null if there was no such document
        return player?.EntityId;
    }

    // This code never runs, because at least
    // one ID is always provided.
    // (but C# must return something...)
    return null;
}
Register new player
The RegisterNewPlayer method should create a new player for the given Epic IDs, save it into the database, and return its document ID. It should not return null. A reasonable implementation via entities might look like this:
public override string RegisterNewPlayer(
    string epicAccountId,
    string epicProductUserId
)
{
    // create the player entity
    var player = new PlayerEntity {
        epicAccountId = epicAccountId,
        epicProductUserId = epicProductUserId

        // ... you can do your own initialization here ...
        // e.g. coins = 100
    };

    // insert it to the database to obtain the document ID
    player.Save();

    // return the document ID
    return player.EntityId;
}
Player login event
When a login succeeds, you might want to perform some logic (like modifying a lastLoginAt timestamp, sending "welcome back" email, etc.). You can do so in the PlayerHasLoggedIn event method:
public override void PlayerHasLoggedIn(
    string documentId,
    string epicAccountId,
    string epicProductUserId
)
{
    PlayerEntity player = DB.Find<PlayerEntity>(documentId);

    // store the other ID if it's known during this login attempt,
    // but is missing in the entity
    if (player.epicAccountId == null)
        player.epicAccountId = epicAccountId;
    if (player.epicProductUserId == null)
        player.epicProductUserId = epicProductUserId;

    // update login timestamp
    player.lastLoginAt = DateTime.UtcNow;

    player.Save();
}
It is a good idea to also store the other Epic ID, if it is known and is missing in the document. This may happen if you, say, only used Epic Account Services at first, but then decided to add EOS Gaming Services later. Or maybe one of the two Epic logins failed when the player was registering and now we know only the other one. Or someone accidentally deleted one of the IDs from the database. It's best to assume things do break. We want to recover when we have the option.