Installation
Getting started with Unisave is fast:
- Create an account at unisave.cloud.
- Import the Unisave Asset into your Unity project and connect it to the cloud.
- Explore provided examples or start building.
And when you get stuck, feel free to ask on our discord server, or send me an email to jirka@unisave.cloud.
Create a cloud account
- Go to https://unisave.cloud/.
- Click
Create Acccountand fill out the form: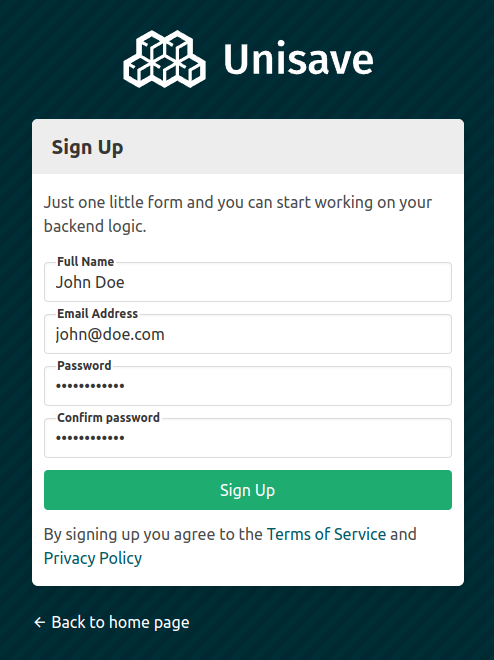
- You will be redirected to the app at https://unisave.cloud/app
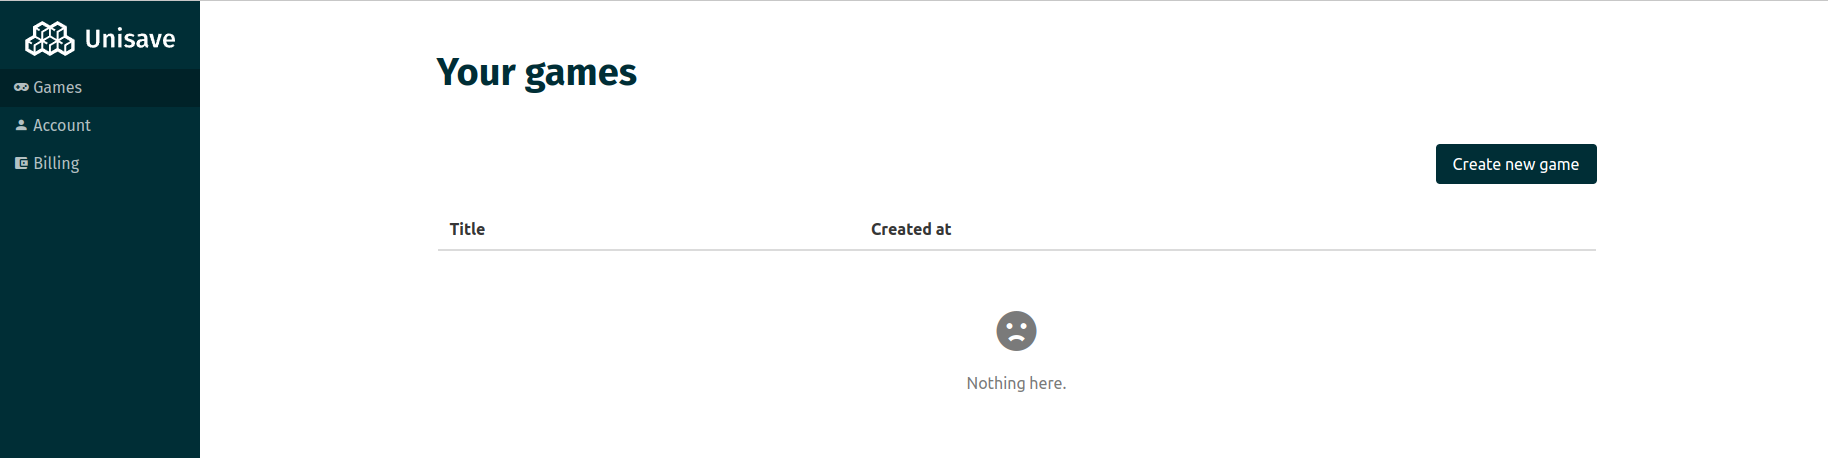
- Click
Create new gameand type in a name. - You will be redirected to the Development Console of your newly created game:
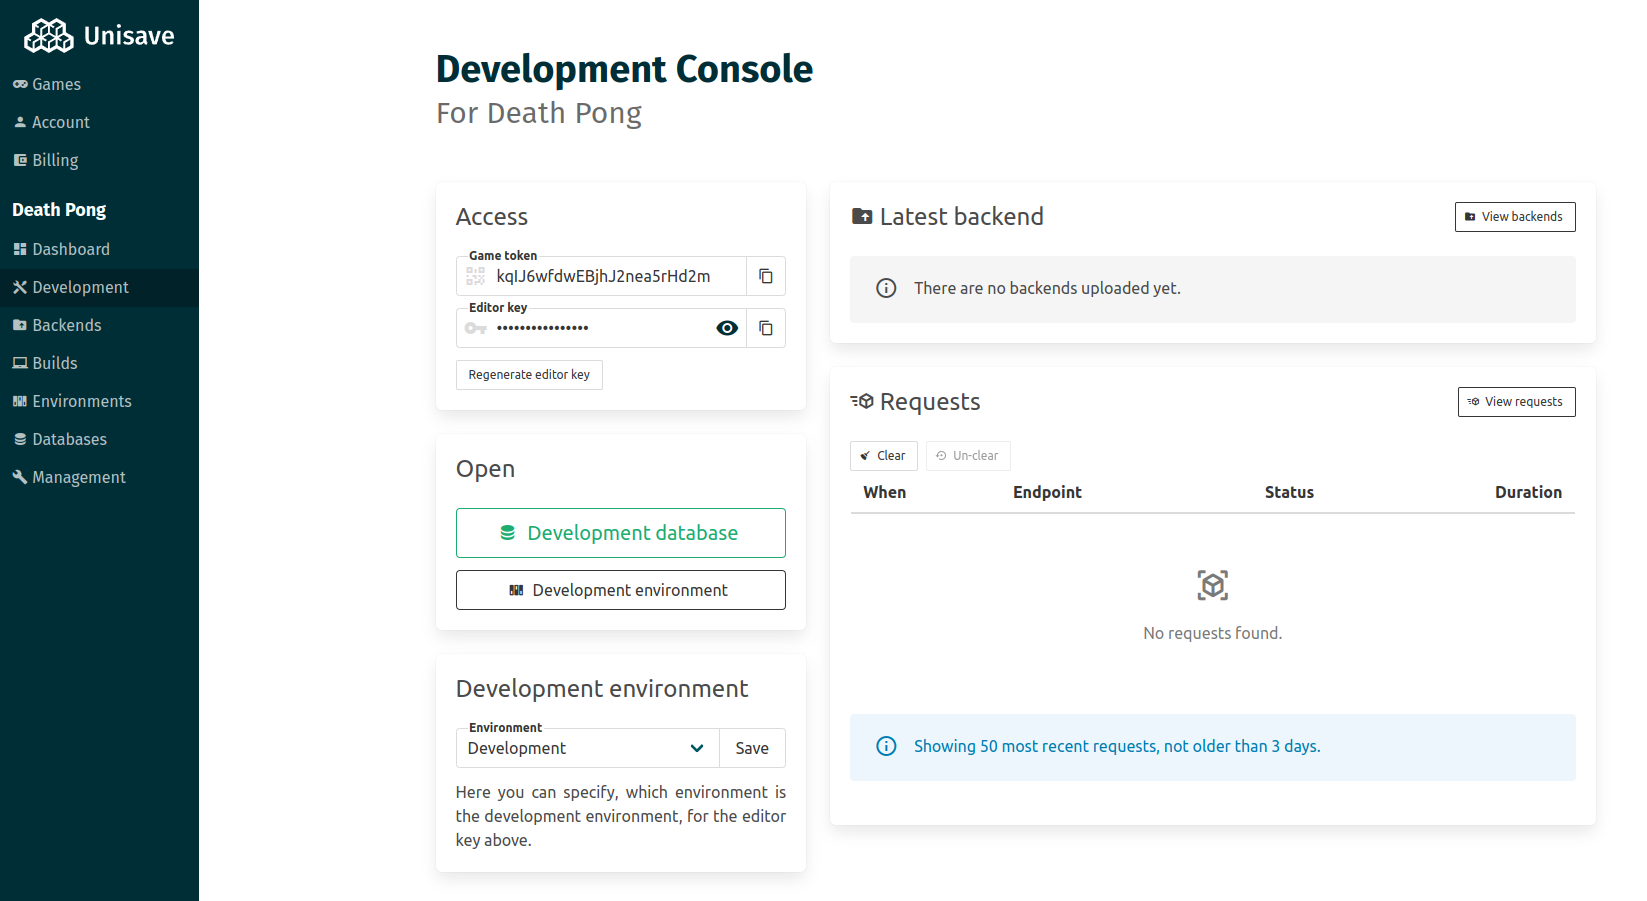
Keep this page open in your browser, you will need to copy the Game Token and Editor Key to your Unity project later - see Connect project with the cloud.
Import the Unity asset
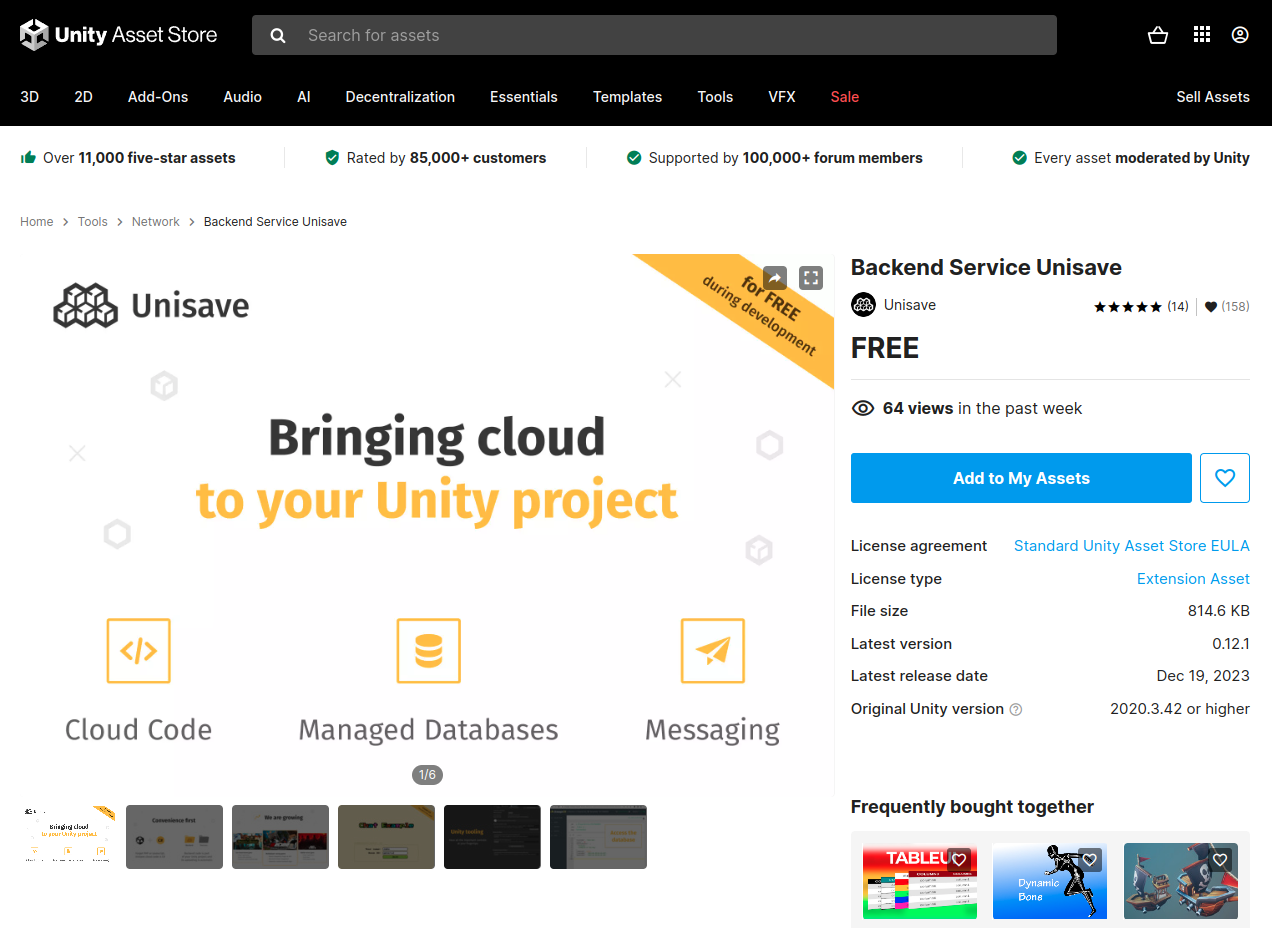
- Open the Unisave Asset page and click the Add to My Assets button:
- Open your game project in the Unity editor.
- Open the Package Manager window by going to menu
Window > Package Manager. - Open
Backend Service Unisaveasset, click on the Download button and then the Import button in the lower-left corner: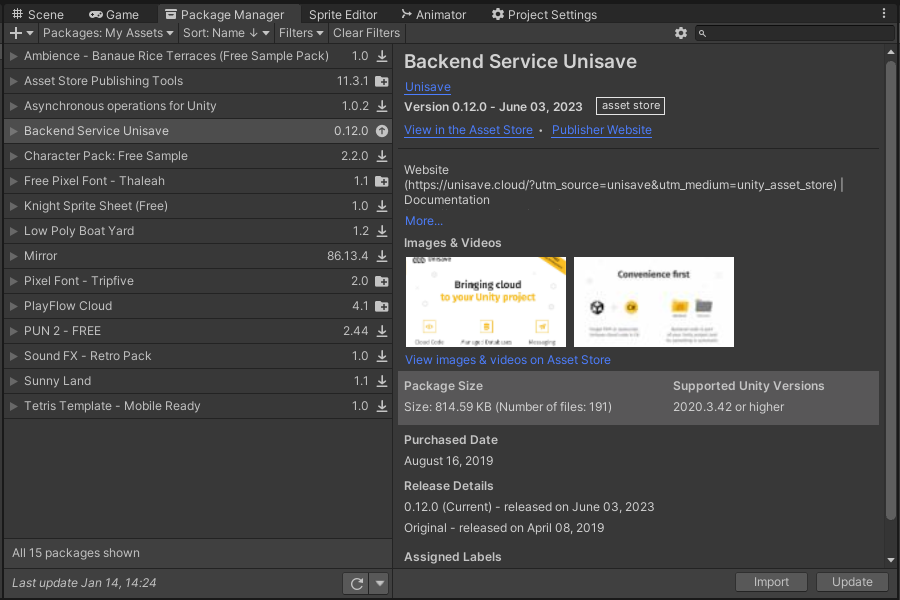
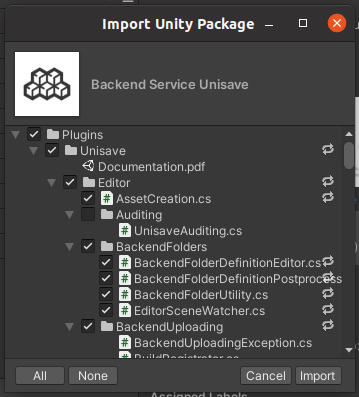
- Import all the files:
Connect project with the cloud
- When the import finishes, the Unisave Window should open. If not, open it from the menu
Tools > Unisave > Unisave Window: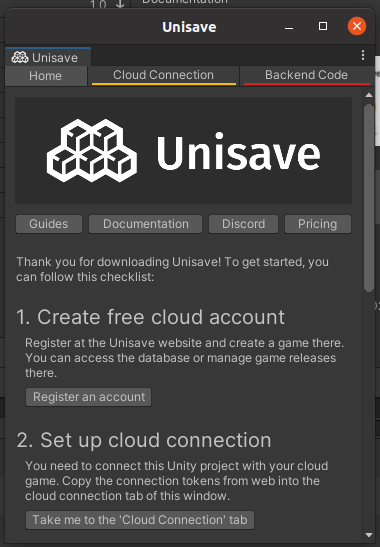
- Click on the Cloud Connection tab and fill out the
Game TokenandEditor Keyfrom the cloud Development Console website (see Create a cloud account):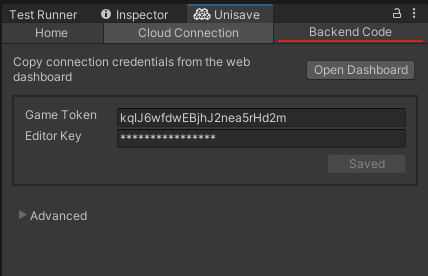
- The backend code (the code of your game's backend server) should be uploaded automatically, but sometimes this system gets confused (especially during configuration changes). In these cases you can go to the Backend Code tab, and click the manual Upload button:
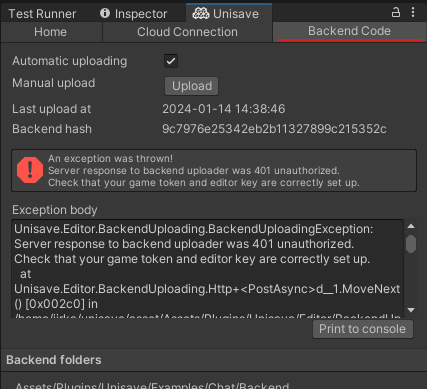
- In this case the manual upload worked and the backend code was successfully compiled. Now the automatic upload system should work, and if not, you will be notified in the Unity console. If the error persists, read the error message - you can see that (in this case) the error was due to the missing token and key.

Explore examples
Now you probably have a specific problem in mind, that you wish Unisave can solve for you. Your actions now differ based on that problem. You can look at the provided examples, but it's likely your problem is very specific and there will not be an example scene for it.
Either way, exploring these examples will give you an idea, how to build custom systems on top of Unisave. Read the next Start building section to learn about backend folders and then the Introduction documentation page, to learn about the structure of the Unisave platform, and which systems to use to achieve what goals. Maybe you don't have to build your feature from scratch, maybe there already is a module, ready to be configured and used.
Start building
The Unisave platform, at the lowest-level, is a platform that runs your backend servers, and gives you access to a database. Your role here is to build the backend server.
The backend server is a piece of software, that runs in the cloud, accepts requests from your game clients (the game you build in Unity Editor), manages the data stored in the database, and communicates with external services.
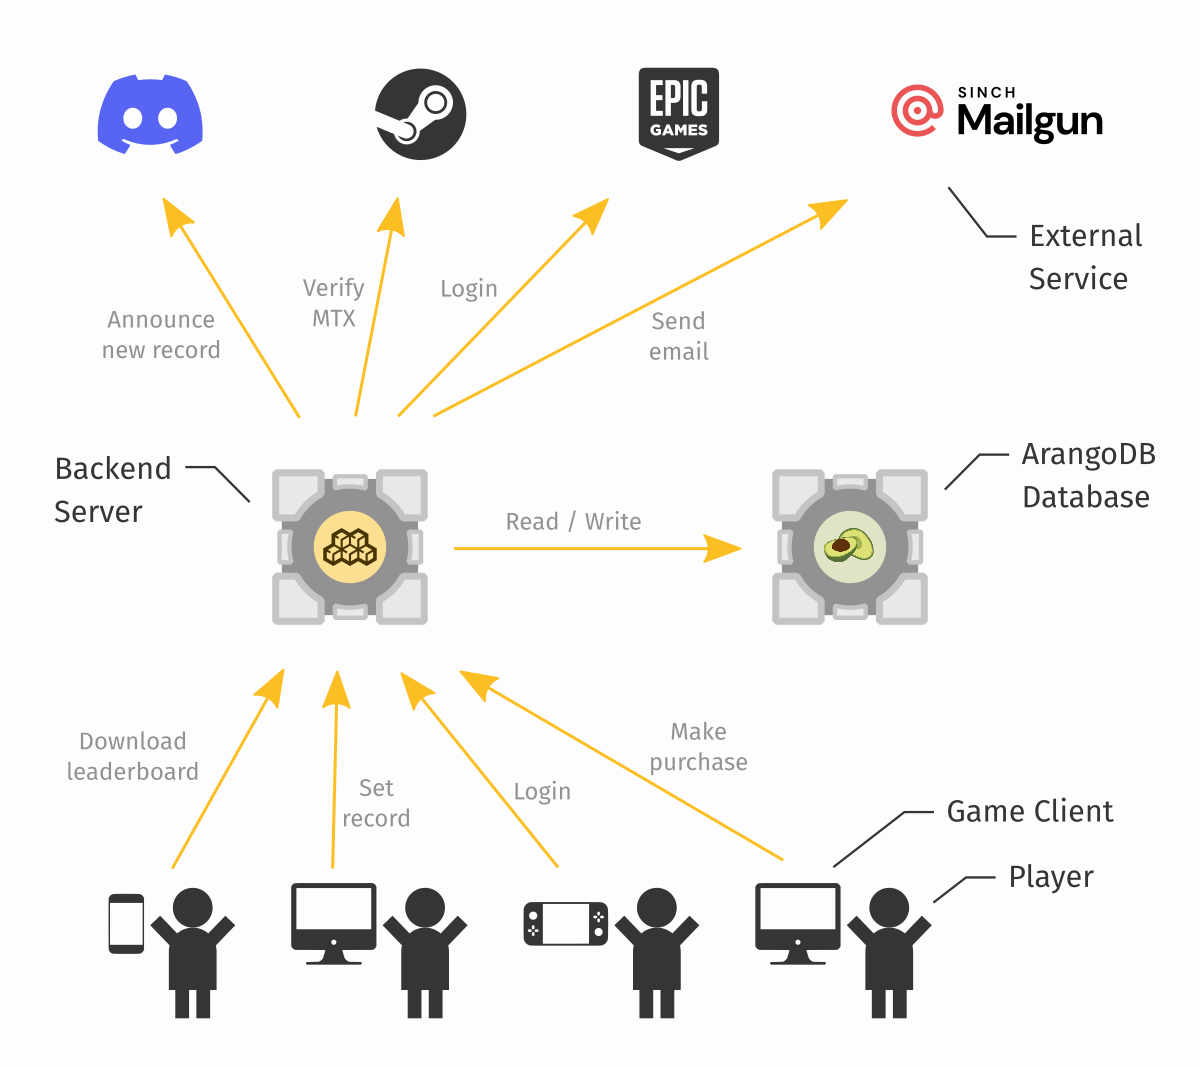
Note: You can view Unisave as a FaaS service, together with a DBaaS service, with a few other auxiliary functionalities, such as code deployment.
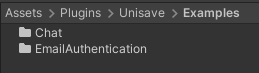
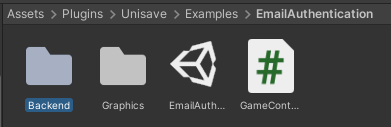
The backend server is written in C# and is part of your Unity project. The code is placed in so-called Backend Folders. It's the same as having your textures in a Textures folder, your code in a Scripts folder, you will have your backend scripts in a Backend folder. Here is the backend folder for the Email Authentication example:
A backend folder can contain C# code used to accept game client requests (see Facets), code to interact with the database (see Entities), code to configure other Unisave modules (see Bootstrappers), or any other custom C# code. The only restriction is that the code cannot access client-side logic (e.g. GameObjects or Components), because there's no such thing on the server.
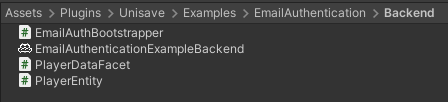
Because these folders are automatically uploaded to the cloud and compiled, they need to be identified somehow. This is done by creating a Backend Folder Definition File inside of the folder. The file can be called anything, you can see it here being named EmailAuthenticationExampleBackend.
Create a backend folder
You will need at least one backend folder that contains your own backend code. Even if you only plan to use existing Unisave modules, you still need this folder to configure the modules.
You can place it directly into your Assets folder. Simply create an empty folder named Backend:

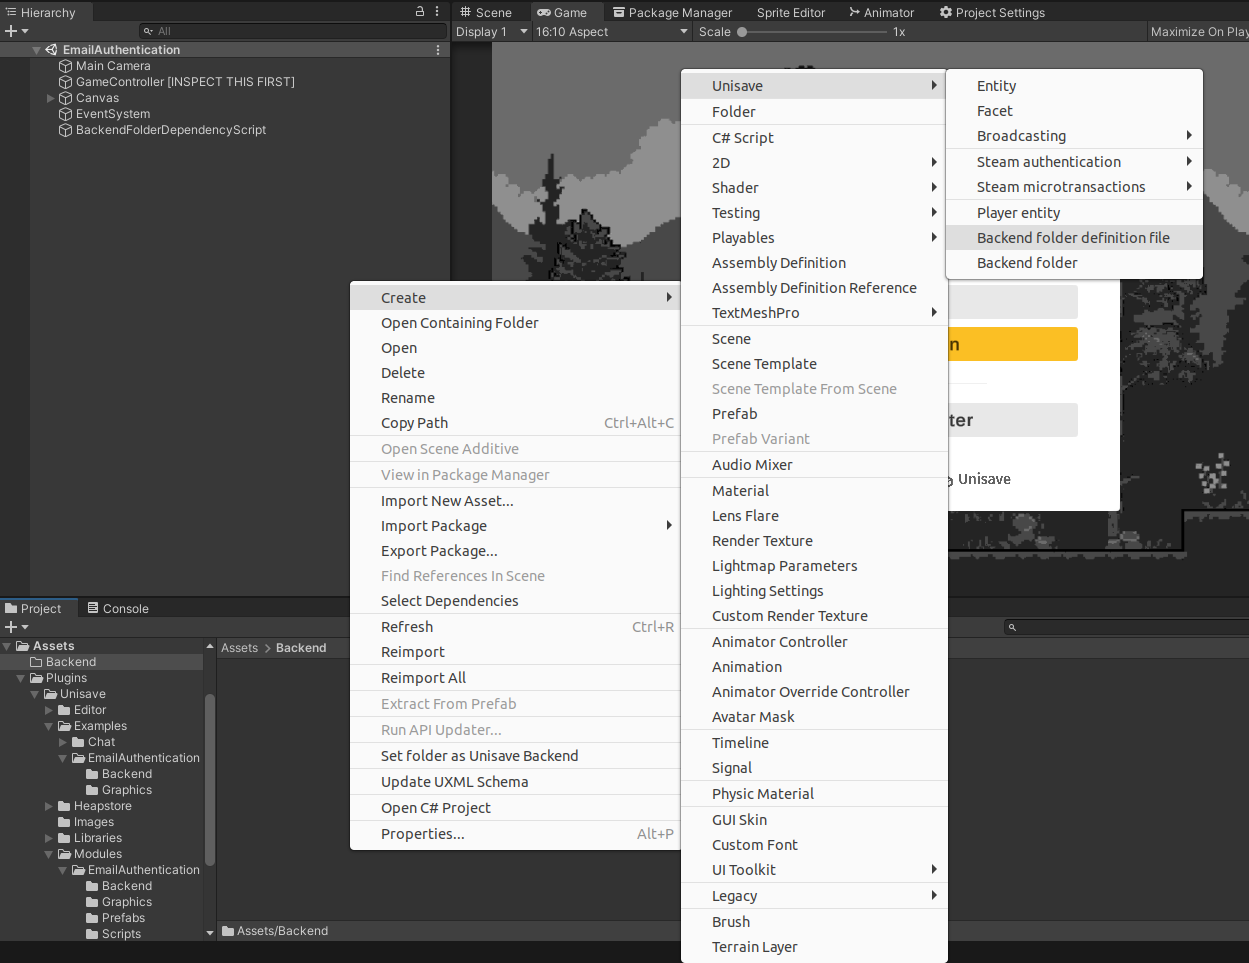
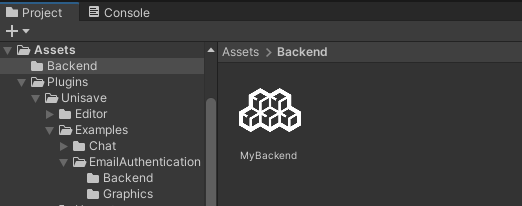
Then enter that folder, and create a Backend Folder Definition File by right-clicking, and choosing Create > Unisave > Backend Folder Definition File. You can call the file MyBackend.
You can now create your own Facets, Entities, and other backend code in this folder.
You can now proceed onto the Introduction page.
Updating the asset
Unity has a bit tricky asset updating. The problem is that it only adds and modifies files, it does not remove old files. This is a problem since Unisave asset is full of C# code and you want to remove deprecated files, otherwise, the update might break the Unisave asset.
The best way to install an update is to delete the entire Assets/Plugins/Unisave folder and then to import the Unisave asset again.
This asset updating behavior is rather weird but it has it's reasons so we just have to deal with it.