

Steam is an important marketplace for desktop computer games. It provides a launcher application, called Steam client, through which your game is started and this launcher also allows your game to communicate with their services, called Steamworks. This guide shows you how to set up communication between your Unity game and Steamworks.
The checklist
If you just want to have the setup quickly done, follow this checklist. If you want to learn more about what is actually happening, read the rest of the article.
- Go to the GitHub releases page of Steamworks.NET and download the latest
.unitypackage. - Import everything into your project.
- Right-click in the
Assetswindow and chooseImport Package > Custom Packageand select the downloaded.unitypackage.
- Right-click in the
This will add the following files to your project:
Assets/
    com.rlabrecque.steamworks.net/       <-- 1
        [...]
    Scripts/Steamworks.NET/
        SteamManager.cs                  <-- 2
steam_appid.txt                          <-- 3
The com.rlabrecque.steamworks.net folder contains all the internal scripts of the library and the SteamManager.cs file is what you will use to talk to Steamworks from your C# scripts. The steam_appid.txt file stores the ID of your Steam game, for which you must:
- Create a Steamworks Account and create a game to get its App ID.
- Enter the App ID of your game into the
steam_appid.txtfile (replace the default480). - Restart Unity, so that it reloads the
steam_appid.txtfile contents. - In the
SteamManager.csfile, find the line that saysSteamAPI.RestartAppIfNecessary(AppId_t.Invalid)and replace theAppId_t.Invalidwith(AppId_t)1234where 1234 is your App ID. This ensures that when your game is built and launched directly, it will re-launch itself via Steam.
That's all, now you can:
- Read the rest of this article to learn how all of this works
- Go to the Unisave modules section to learn how to install Steam-related Unisave modules
- Go to the Steamworks.NET Getting Started documentation page if you want to talk directly to Steamworks yourself
Upgrading to newer version
The safest option when upgrading is to delete all the files belonging to the Steamworks.NET package and then go through the checklist again. ☝️
The files to delete are the com.rlabrecque.steamworks.net folder and the SteamManager.cs file. The steam_appid.txt file can remain in place, unless you want to remove Steamworks.NET completely.
Steamworks SDK
The official way of talking to Steamworks is the Steamworks SDK, which can be downloaded from here. The downloaded zip file contains a number of tools and libraries:
steamworks_sdk_162.zip:

sdk/
    glmgr/
    public/
    redistributable_bin/
    steamworksexample/
    tools/
    Readme.txt
For example, the tools/ContentBuilder is used to upload a built game binary to Steam. However we are interested in redistributable_bin/steam_api.dll. This library is what must be included in your game to be able to talk to Steamworks (and also libsteam_api.so for linux and another one for mac).
The library provides public methods for interacting with Steamworks for you to call from your game. It implements these methods by communicating via inter-process communication (IPC) with the running Steam client. If the Steam client process is not running, the library refuses to do any work. It's then up to the Steam client to communicate with Steam servers.
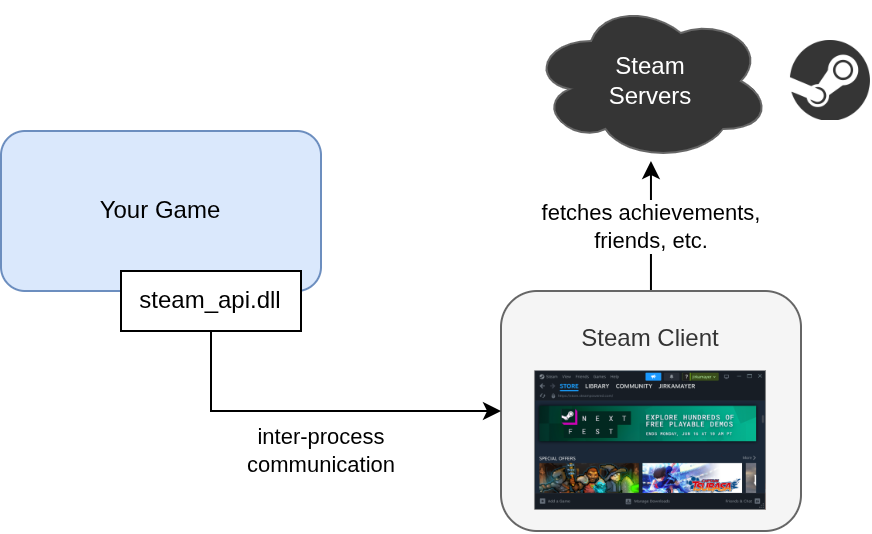
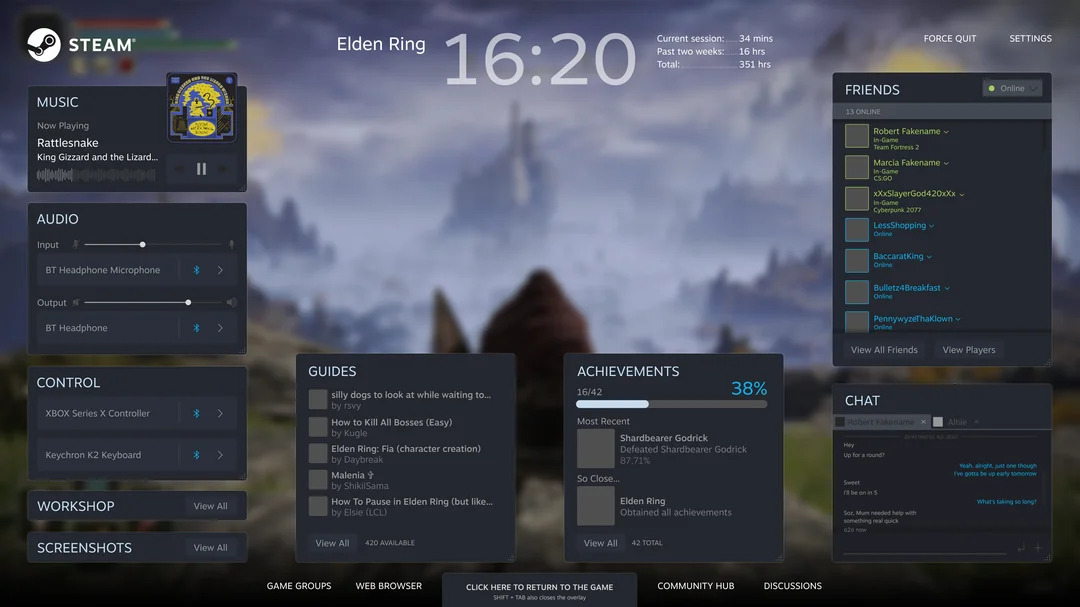
The library can also render the Steam Overlay, which is Steam-related user interface that is displayed on top of your game. You have no control over this overlay, the library manages all of it. For example, when you initiate a microtransaction, this library will display the overlay, pause your game, handle the purchase, and then return control back to you once it's all finished (or failed). Notice that the overlay is really a part of your game! It is running in the same process, just the code is imported from the steam_api.dll library.
This becomes a complication when used in-development in the Unity editor, as Unity also shares the same process as your game. The Steam APIs that only communicate with the Steam client (such as getting the logged-in player) work fine in Unity, but APIs that open the overlay (such as microtransactions) cannot be tested from within the Unity editor. Instead, you must build the game completely, upload to Steam (maybe as a beta branch), and launch it from within the Steam client. This is quite painful, but I found no other solution. Just remember that when you get a non-sensical error in Unity, this might be the reason.
To do the Steamworks integration, you could place the steam_api.dll library into your Unity project and start talking to it. However, the library is written in C++, which is a pain to talk to from within C#. Luckily, people have built wrapper libraries that provide access to it from C#, and they also handle all the integration related to game-pausing and Steam overlay for Unity.
Note that this C++ interface of the library is what is documented in the official Steamworks API Reference documentation page.
Unity and C# wrappers
For talking with the Steamworks SDK from C# or Unity, there exist a number of wrapper libraries:
You can only use one of these in your Unity project, as the steam_api.dll library can only really be loaded and managed once.
I chose the Steamworks.NET for Unisave modules that integrate with Steam, because it provides the most one-to-one mapping between C# methods and the underlying C++ Steamworks methods. This means you can rely on the official Steamworks documentation and the information there will directly apply to the Steamwork.NET library.
For example, this is how the method for obtaining player's Steam ID (see the docs) is translated into C#:
// C++
CSteamID steamID = SteamUser()->GetSteamID();

// C#
ulong steamId = SteamUser.GetSteamID().m_SteamID;
The downside is that the code is really ugly and awkward to use, as it's really just C++ in C#'s clothes.
SteamManager.cs
The Steamworks.NET library is integrated into your game through the SteamManager.cs MonoBehaviour script. It handles the loading of the DLL and all of the integration so that you can then use the static methods to actually access the Steam API (such as the SteamUser.GetSteamID() method).
It does the following:
- Makes sure it only exists once and that it survives scene changes.
- Re-launches your game through the Steam client, if launched directly.
- Loads the
steam_api.dlllibrary. - Initializes the connection to the Steam client.
- Consumes callbacks coming from the Steam client and invokes them within the body of its
Updatemethod.
The easiest way to make sure you have the SteamManager present in your game is to create an empty game object in your startup scene and add the SteamManager to it. If you have it in multiple scenes simultaneously, it's ok, it will only be used once and the other instances will destroy themselves automatically.
Alternatively, you can create it programmatically by reading the SteamManager.Initialized static property:
// This creates the SteamManager if it does not exist yet.
var _ = SteamManager.Initialized;

// We can just throw the variable away (underscore), since
// we don't need to do anything with it.
Run this code in Awake so that the SteamManager is initialized by the time your Start method runs. You cannot use it immediately, its Awake method must be called before first use.
Unisave modules
Unisave is a game backend platform that lets you build a custom backend server. It can be used to register players and store their data online. Unisave provides ready-to-use modules that integrate it with certain Steam features. For example, in order to use Steam Microtransactions, Steam needs you to have a "purchasing server" which acts as a safe place to store all your player's transactions and also your Steam API keys. The Steam Microtransactions Unisave module provides this purchasing server, as well as additional code to make the integration easier.
Unisave currently provides these Steam modules:
- Steam Authentication (login via Steam)
- Steam Microtransactions